

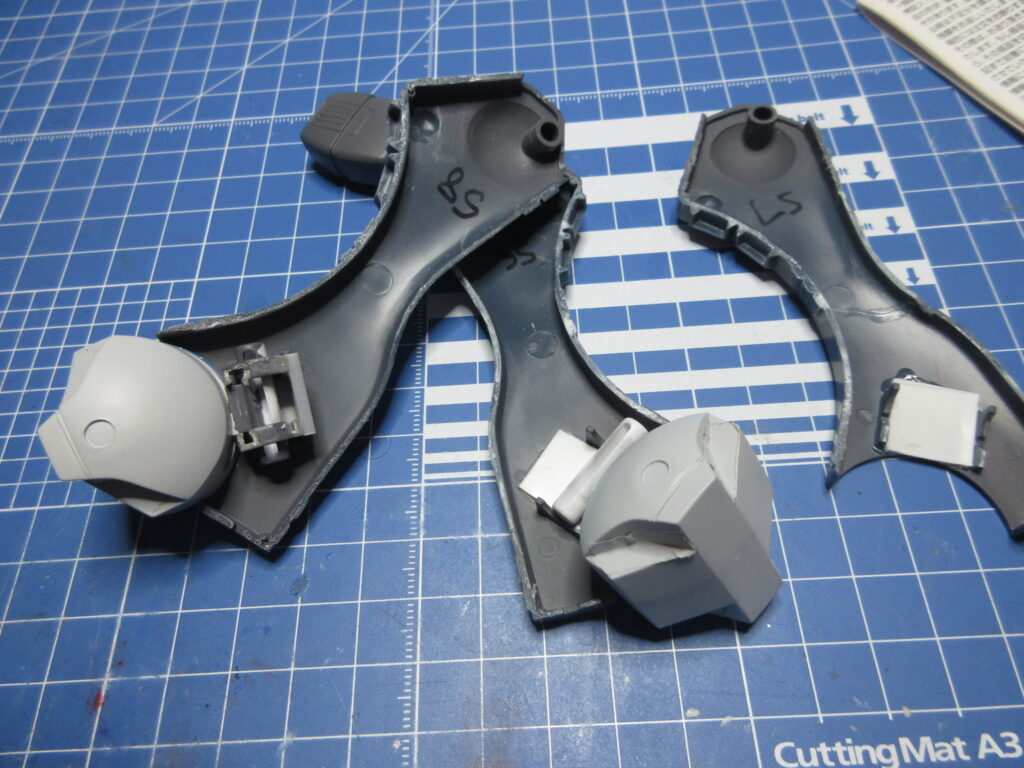
With the way the feet are out of the box, there isn’t a lot of lateral movement. The feet have these cylinders that plug into brackets and have end caps which keep them in place. No glue required, I guess. Well, the problem with that is that there isn’t much lateral movement with the feet this way. The end caps have locator tabs which correspond with the brackets, making the feet really straight. That’s not what I want if I’m to have the legs splayed apart. These old kits, when built straight out-of-box, generally build up to be Stiffy Stifferson. For more dramatic poses, such modifications are necessary!
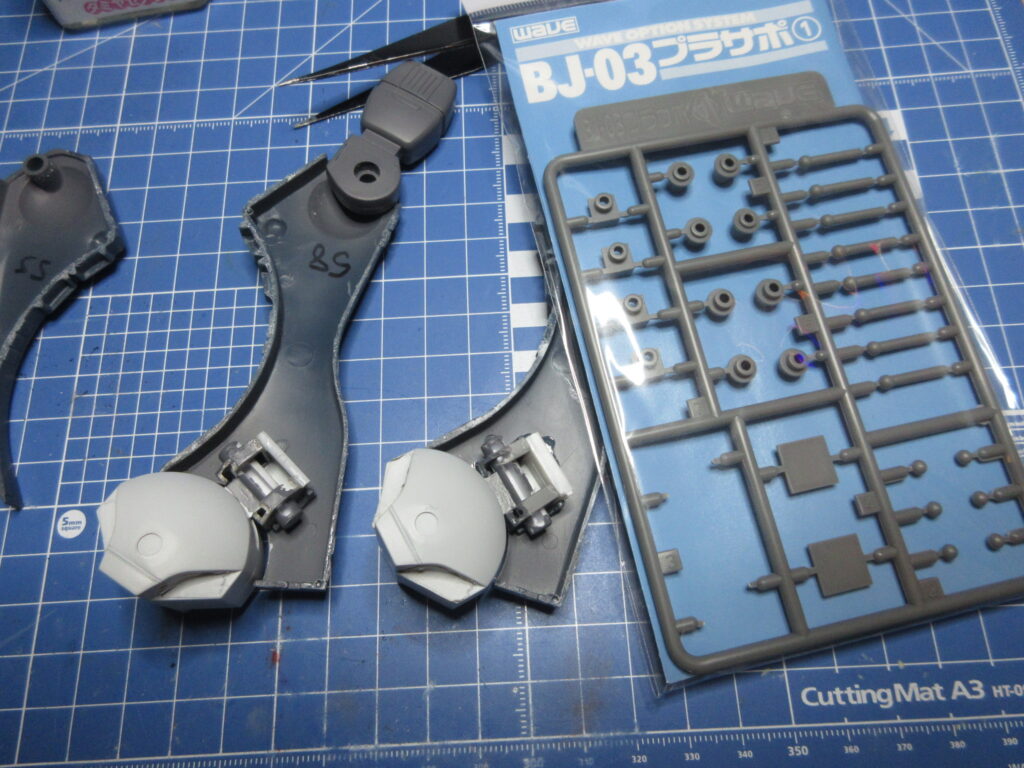
I noticed that these cylinders fit excellently into the 5mm hole sockets of the square parts of the BJ-03 Pla-Sapo (“plastic support”) sets by Wave. Above you can see how I snipped off the bottom of the brackets and placed the square parts a bit lower so that these cylinders can allow more lateral movement. Those end caps are now no longer required!
When the leg halves are put together, I noticed that there was an 11 mm gap between the brackets. The square parts are 10mm, so I used Tamiya .5mm plastic sheet between the brackets in order to create a snug 11mm width. (You’ll see the white sheet plastic glued into place in the pictures.)
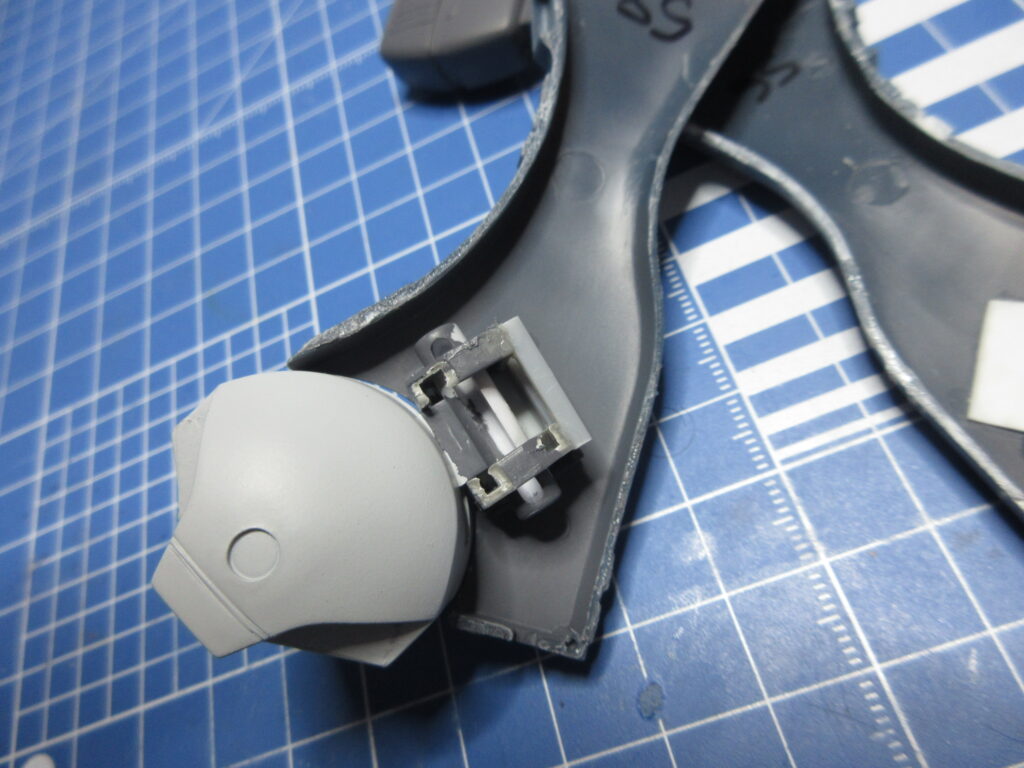
Oh but wait… the square shapes were preventing the feet from swinging side to side, so I cut off their corners. I used Wave 2mm plastic sticks to act as braces. I also hand-painted the parts gray so that they won’t be so noticeable.
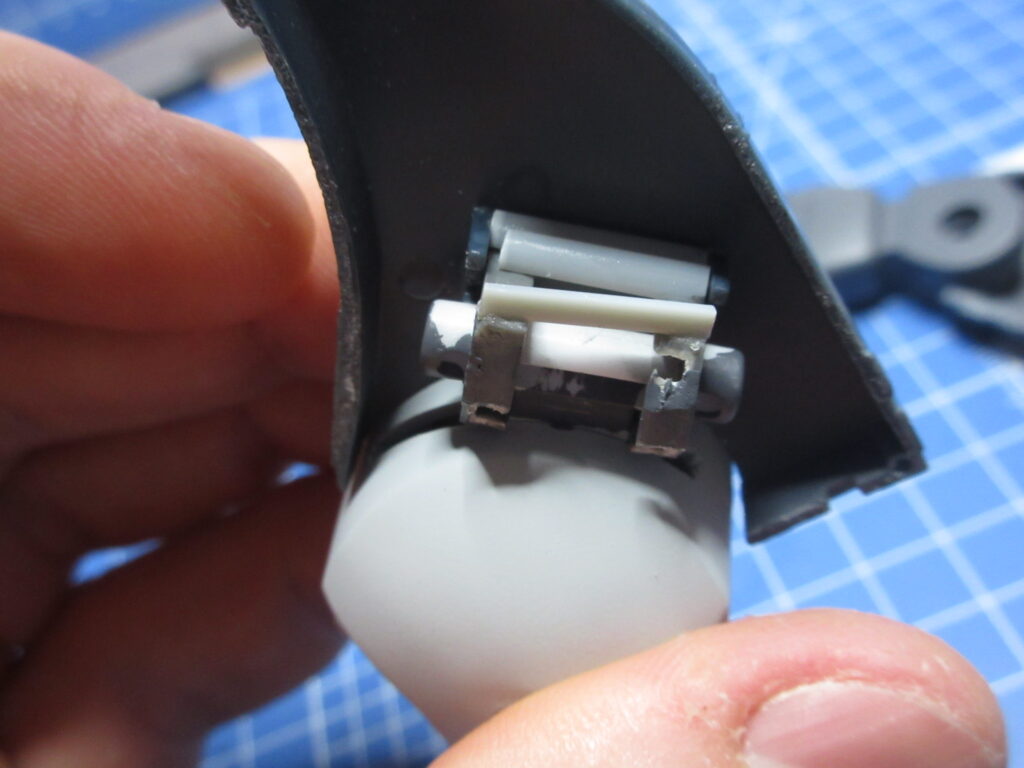
It’s crude, but it works. I also had to cut off the top corner of the front square because apparently the legs are a bit tapered towards the front, I guess. I’m not sure.
So now both feet are complete. I used Tamiya 4mm square plastic rod to brace the other foot. From here, all I have to do is put glue in the right area and sandwich this work in between the two leg halves and be done. Now I can resume painting.