Nautilus
January 2008
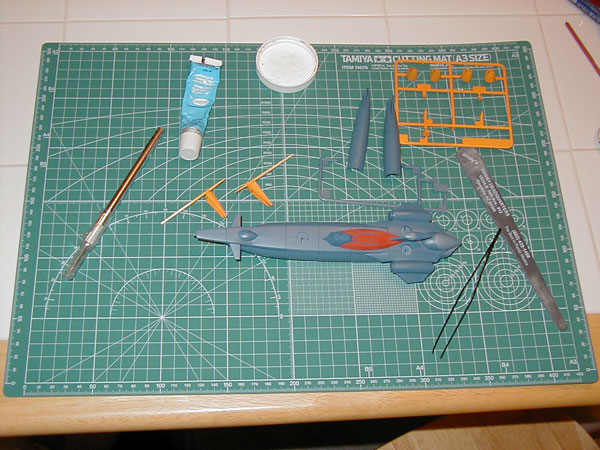
This is a very basic model of Captain Nemo's Nautilus from Fushigi No Umi No Nadia, with very few parts to assemble. Since I'm finally comfortable with using my new Paasche airbrush, this model is 95% airbrushed with Tamiya acrylic paints. The yellow parts are yellow paint with a touch of red to make it slightly orangish, the hull is blue with gray, the lighter parts have less blue, and the red top part is red with a bit of brown to darken it. The nose cones are actually hand-brushed red Testors enamel paint, the only hand-brushed part of the whole model.
I left most of the yellow parts on the runners to paint them, and used toothpicks to paint the longer parts. I assembled the main part of the hull and painted it, but the color turned out a bit too light for what I wanted. So, I mased the observation bubble areas off and darkened up the paint mix for a second go around. I peeled off the Tamiya masking tape and the observation bubbles were perfectly intact. The strange thing is, however, even after the paint had dried for a few days, it still came off with a touch of my fingers in two places. Perhaps it's because I did not prime the model, but the paint should've been dry by then. It's possible that my hand was not completely clean when I handled it. So, I had to try to color-match the hull's paint to touch up those two small areas. I didn't get it perfectly, but it's good enough not to notice it immediately. After this, the final assembly was a snap. The water turbines are more of a grayish color with just a touch of blue.

I airbrushed the model with Future Floor Polish (now called Pledge with Future Shine). After it dried, a few days later I mixed flat enamel black and gray with Zippo Lighter Fluid to do the panel lines. When it was complete, the results show that I am starting to get the hang of airbrushing to make models look a lot better!
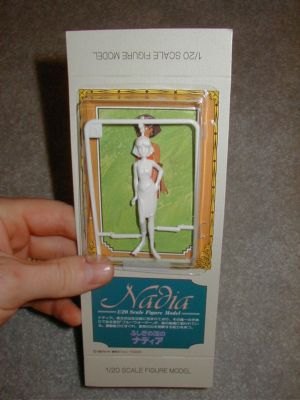
When I first bought this model, I was surprised to find that the model comes with a small figure of Nadia. It was small, and I was sure that it would be very difficult to paint. It's made of the same typical plastic the model kit is made of. I've never painted an anime figure before, so I consulted the members of the Hobby Fanatics forum as to how I should go about painting the Nadia figure it came with. I primed it with Tamiya surface primer and painted the figure with Delta Ceramcoat as someone on the forum suggested I use. Fortunately, the instructions explained how to get the skin tone: brown, white and orange. Her hair is black with a tint of blue. Her shoes and sash were brown and black mixed. The gold bracelets and earrings are Testors gold enamel paint. I learned that ceramic paints do not always mix well together. The Ceramcoat black did not like mixing with Mr. Hobby Gundam Blue, so I had to get Ceramcoat Ultra blue. (It wasn't until later that I found out that Gundam Color paints by Mr. Hobby are actually lacquer paints, not enamel.) The list of Delta Ceramcoat colors I used are White, Black, Cardinal Red, Ultra Blue, Bittersweet Orange, and Spice Brown. I finished it off with an overcoat of Future.

This is nothing compared to what I see others doing on the Hobby Fanatics forum, but I am impressed with what I was able to do for a first-time model. I think I did a fairly good job my first time around, considering that I've never painted an anime figure before (and a small one at that). The figure actually looks a lot better in-person. The zoom on the lens, in conjunction with the flash, accentuates where the paint was applied unevenly. Also, it turns out that the Spice Brown Delta paint is semi-opaque, so the flash reveals a bit of the primer underneath that is not visible when looking at it with the naked eye. From now on, I'll be far more careful with these Delta Ceramcoat paints to make sure I'm using opaque paints. But by far, these crafts-grade paints are pefect for painting small figurines, after they are diluted with some water.
